Cloud computing and storage services are becoming an essential for many businesses. As a more versatile and easier to scale option than on-premise solutions, their demand has noticeably increased. As businesses look toward these solutions, developers must grow and adapt. Students or professionals without much AWS experience can broaden their skillset by playing around with these platforms. Luckily for this demographic (myself included), the three main cloud providers—-Amazon Web Services (AWS), Google Cloud Platform (GCP), and Microsoft Azure—-all offer free tiers to get started learning and experimenting.
These services are much different than what’s learned in the sometimes archaic education system, so they can be confusing and easy to get wrong when learning. The goal for this article is to demonstrate how to set up a personal-use Amazon Web Services account according to some best practices for Identity and Access Management (IAM). This will be targeted at students and professionals without much AWS experience, and should be about a 10 minute read (although you’re encouraged to try things out yourself). Learning how to properly setup and authenticate your work in the cloud is important for three reasons: 1) to mitigate any opportunities to compromise yourself, your work, your billing information, or other sensitive data, 2) to mitigate any opportunities to mess up and get frustrated, and 3) it’s always good to follow best practices!
If you’re just getting started working with cloud services or are looking to begin, I think this article presents a good first or second step. I recommend following the tips at the bottom as soon as you feel ready!
Terminology
For me, one of the most difficult aspects of learning how to use cloud services was hurdling over the increase in vocabulary. Many terms are polysemous with other developer terms and appear to be drawn together from a variety of computing subdisciplines. Quickly, I’ll introduce some key terms which you should be familiar with as you endeavour into space.
- IAM
- The Identity and Access Management section of AWS allows one to control the degree to which different people and services can access parts of the AWS account. It’s how permissions are set and security tightened.
- Root
- In a hierarchy of control, the root users has access to everything. It’s like using `sudo` in a shell program. We’ll cover this soon, but it’s strongly discouraged to use this login on a daily basis due to the power it holds. For example, under this user you can control the accounts billing information and payment methods.
- User
- A type of individual with less power than the root user. These can be granted unique login credentials. Some common users would be Administrators and Machine Learning Engineers – obviously the MLEs should have less power than the full admins, and by assigning people to user accounts, that can be controlled.
- Group
- A collection of users with a pre-specified set of permissions. These are useful because it’s easier to manage a collection of users rather than manually going through a list of users to change their individual permissions. Using groups is simply a way to attach permissions to multiple users at one time. A common example is an Administrators group, which can have multiple admins all with the same permissions.
- Role
- A collection of policies/permissions assigned to one or more users when needed. The key here is that, separately from groups, roles provide temporary security. These are useful if you want to, for example, provide credentials to an external group for auditing purposes, or to assign a set of permissions to an AWS service that allow it access another AWS service.
- Policy
- A policy is a marker that defines permissions. These can get complicated, so here’s a link to the in-depth explanation. For example though, one might create a group called `MainTableAccess` and assign some users to it, and the policy attached to this group only allows those in the group to access a specific table in a DynamoDB database.
- Service
- One of the many subplatforms on AWS that can cause functionality, such as Lambda or EC2.
Quick Setup
Tip #1
The first key to securing your AWS account and ensuring your permissions won’t allow you or others to intentionally, or otherwise, compromise your account, is to follow the least privileges model. Under this mindset, we only assign permissions as they’re needed. This ensures no user is too privileged, to the point where they may accidentally harm the account.
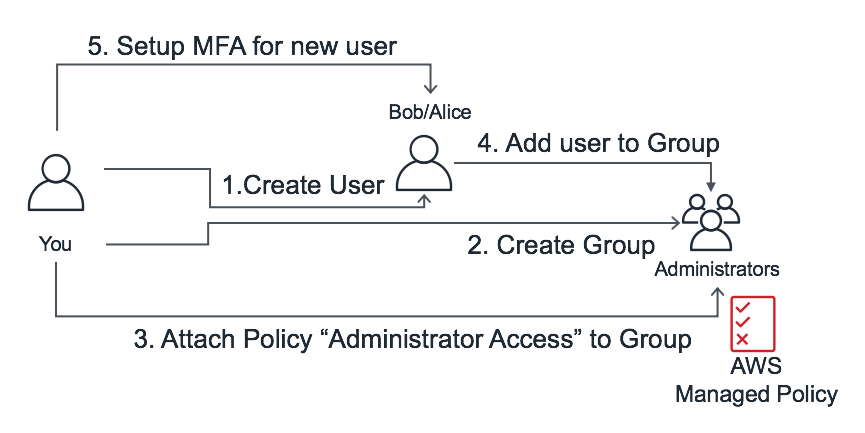
Most importantly, make sure that you set up a non-root user. You’ll almost never want to use the root user. Instead, here I’ll guide you to setting up an Administrator user. Administrator accounts don’t get to access things like billing information and cost management, although they can do things like manage users and groups which less powerful users cannot.
To add an administrator user to your personal AWS account, navigate to your AWS home, where you’ll see an option to add a user. Name your new user Administrator or something like it. I assume you’re working through the console, but may later want to set up the AWS command line tools, so check off programmatic and AWS Management Console access. Choose to set a password later (if you set one now you’ll still have to reset it later). We’ll create a new group of users called Administrators and select the AdministratorAccess policy. Skip the Tags section and review what you’ve done. There will be a link in the success box which, upon clicking, will log out the root user and prompt you to log in under a new user. Your username is Administrator (or whatever you chose) and the password was that which was generated.
Tip #2
My second tip is to set up Multi-Factor Authentication (MFA). This is an added layer of protection from anyone unwanted accessing your account, which becomes more important your projects and work scale up. For students at UC San Diego, we’ve become accustomed to using Duo Security as a two-factor authentication system. With Duo, when you log in with your username and password, you’ll also be prompted for an authentication response within the app.
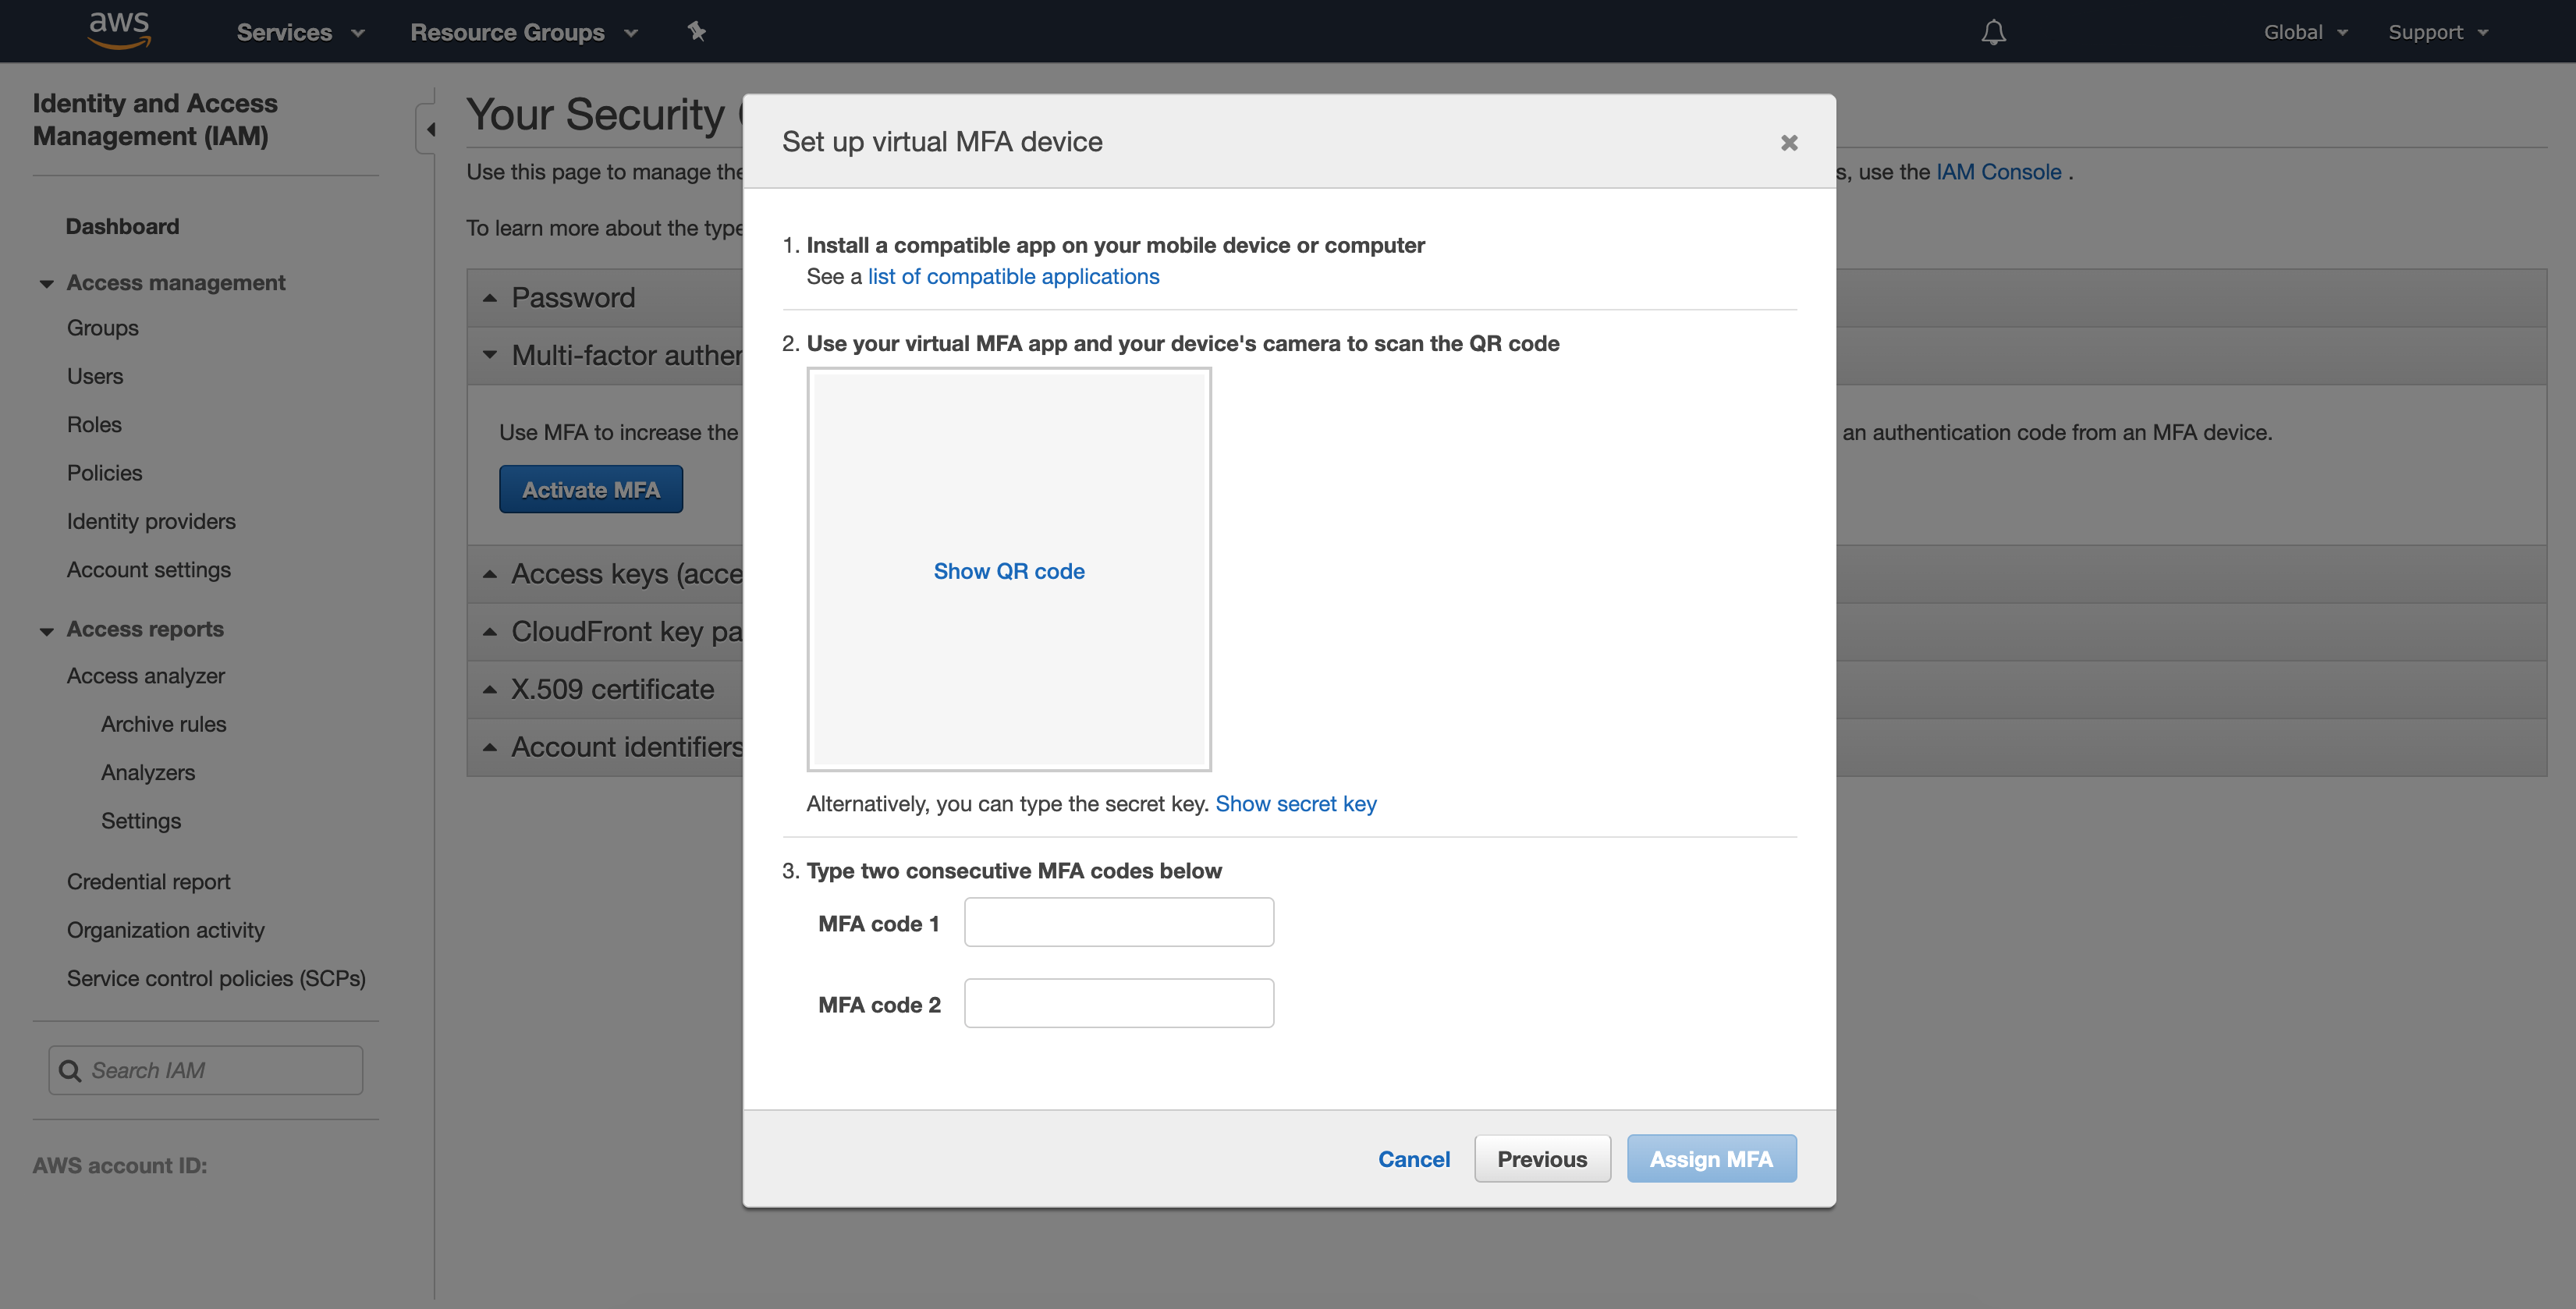
To set up MFA, navigate to your AWS IAM home, where there will be an accordion of security credential options. Select to activate MFA, and choose Virtual MFA Device. Open Duo, scan the QR code, and enter in the authentication keys. Done!
Overview
That’s it for this post, but I encourage you go on and explore the IAM aspect of AWS further, especially in regards to the policies and roles that may be set. Once we begin setting up services like Lambda and DynamoDB, it will be important to only allow the bare minimum of what they need to access.